Showing posts with label I Tried It. Show all posts

Tuesday, April 17, 2012

I Tried It: Flat Iron Curls

***Be Prepared, this week is going to be all about hair!***
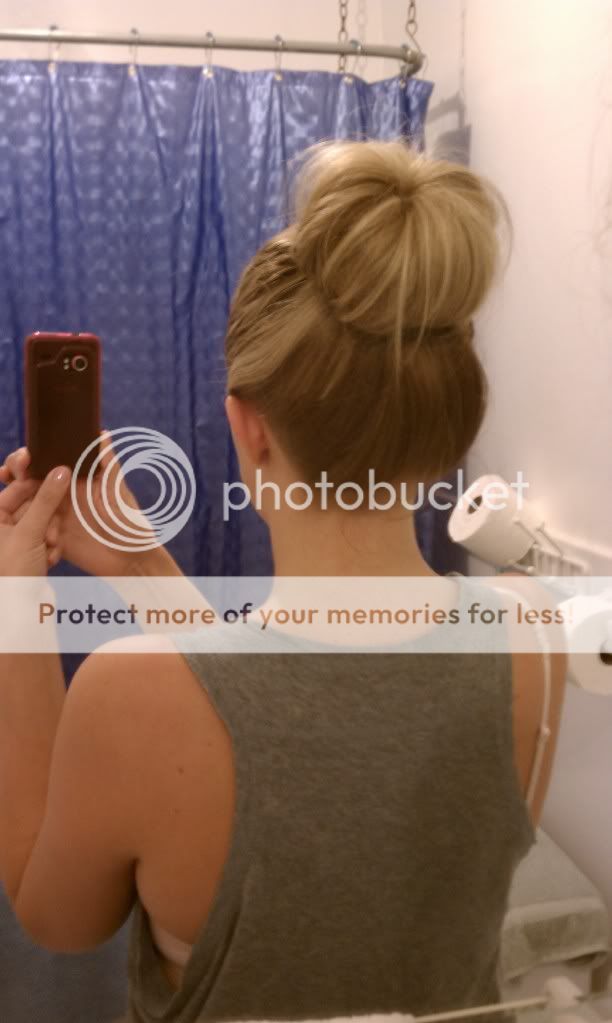
So some of you longtime readers may remember way back when I posted about how I wanted to learn how to curl my hair using a flat iron. Well, I've finally learned how thanks to Steph from Hair and Make-up. She's the bomb. She has a TON of tutorials that are super easy to follow and tips on each post to make sure you're doing it right or how to do it easier.

Now, I'm sharing pics with you from my first time doing it, and I'm not a pro by any means. Oh, and I'm also in my bathrobe.


I curl my hair nearly every single day (you can see how here, here and here), but lately I've been sick of my hair looking the same all the time. Granted, there's not a huge difference from my loose curls, but enough of one to keep me happy. Plus, it's a new skill I learned.

The curls lasted all day long and looked good even when I was going to bed. It takes me a little bit longer to curl it this way versus using a regular curling iron. Now, I would share with you how-to or tips, but I'd pretty much just be copy and pasting Steph's entire post. I have nothing new to share with you that she didn't cover so head over to her if you're interested in learning how.

How do you curl your hair? What way to you prefer?

Tuesday, November 8, 2011

Everyone, You Can Stop...

looking for a red lipstick that lasts! I've done the dirty work and I've found one for you!


Remember my Sephora F/F purchases? Well that Always Red Lipstain is a diamond in the rough. This stain is no joke! I put it on at 830am and wore it through to 2am while only touching it up twice! The second time I didn't really need to touch it up, but did just out of habit.

Plus, it's the most perfect shade of red. It's warm and bright and I think the color would work for a variety of skin tones and hair colors.

I wore it to work and out that night, and I'm not kidding you, in two days time 12 people complimented me on it. 12! Twelve! Half of which were complete strangers.All I could think to myself is that I hit the red lip jackpot.

You might remember the first time I wore red lips (see the post here) and wearing red lips is seriously high maintenance. It wears off, it's obvious if it smears, the color can bleed, you have to constantly check for color on your teeth. It's a nightmare.

Not with this puppy. Oh no. This stuff lasts. I ate, drank, and talked all day/night and my lips were nearly perfect. You do have to do the usual blotting and you need to be careful about applying the color, but luckily it takes a few moments to set so you do have time to clean up any mistakes.


I've told you the good stuff, here's it's downfalls:

For one, this is the only shade of red the product comes in so if this shade doesn't work for you, you're outta luck. 
It's a bit drying, so you do need to wear a chapstick with it midday. 
It's hard to take off once it's set. I had to seriously scrub my lips to get it all off, and that's after using a makeup remover.
While the color stays on your lips, it does come off onto whatever you touch like a regular lipstick. It just stays on your lips without wearing off.

Another feature of the stain is that it's matte. Which I thought could be weird, but I loved the look! Plus, you can always top it with gloss so it's no big deal.

Overall, I seriously love this product! I'm so glad I took a chance and went for it. I'm wearing red lips all the time now and without the fuss. To apply, I use a liner first around my lips and then apply the stain, blot and clean any mistakes. Wala!  I couldn't be happier with this product!

Do you wear red lips? What product do you use?

Tuesday, October 25, 2011

I Tried It! A Top Knot via a Hair Donut

I tried it and it's life changing people! Dead serious here.
You know the top knot trend that these ladies are wearing? A donut is how you get the look my loves.
Conair Bun Maker

The first time I heard about a hair donut was on Glamour's online beauty column The Girls in the Beauty Department. It's a hair product shaped like a donut that you place at the base of your ponytail to form a larger bun with your hair pinned around it.

Genius right? I always wondered how some celeb beezies got such gorgeous giant buns.

This is perfect for my hair because it's medium length and very fine. My buns are seriously like 1 1/2 inches in total. If that. Previously, I could only find these gems at beauty supply stores, but they've recently started popping up at Target and Rite Aid. Then, imagine my surprise when I spotted it at the 99 cent store! I couldn't wait to get home and road test it!

I rocked this last week for work (no I did not wear that tank to work, this is at the end of the day in my pj top) and all my girls asked me how I did it. I couldn't wait to share my secret! I love finding great things or learning new tricks and telling everyone within earshot how cool/easy/awesome it is.

I'm using Conair's Bun Maker, but at a beauty supply shop, you can get different colors and sizes as well.

The whole process takes maybe 5 minutes and you're good to go. Sleek bun for a wedding? Done. Want a side chignon for a date? Done. Messy bun to wear to meet your girlfriends? Done. Best. Invention. EVER.

I put my hair in a pony where I'd like my bun to be, pull my entire pony through the donut so that it's at the base of my pony tail (right on top of the elastic), then pin my hair around it on all sides. I've teased it a bit for some extra texture and then messed with it a bit afterward with my fingers for a not so perfect look.

The way I did it works best for my length, but for those of you with long hair, here's a quick how-to for you:

Oh and yes, you can use a tube sock to make on for yourself if you can't find the one I have. I chose not to do this because I didn't have a sock to use and I didn't want to buy a pair just for this. Also, the Conair one is kind of a netted material so bobby pins go right through it without any hassle.

I can't wait to use this more and to get a messy updo that's super chic. I seriously see myself using this product regularly. Since my hair is fine, I rarely do updos without the used of my extensions for extra volume or length and this product is so simple to use and is exactly what I need to just throw a cute look together.

Have you heard of this trick before? Have you tried it?

Let me know if you'd be interested in seeing a how-to video, I was thinking of doing one for it...

Tuesday, July 12, 2011

I Tried It/Product Review: OPI Black Shatter Polish


I've seen OPI Black Shatter Polish all over the web and magazines, it was in Serena Williams' and Katy Perry's collctions and now they have a whole Shatter Collection full of different colors. The shatter is always sold out everywhere, all the time. When I checked out Ulta this week, they had huge signs posted around the displays allowing each customer to only buy one shatter polish at a time. They only had one black left and I snatched it up and hid it with my other purchases so no one would try to jump me for it.

Originally, I was just going to pass on the polish. I mean, how often am I going to "shatter" my nail color? That's until I saw this nail look in Instyle and had to re-create it. I mean I just love leopard print (but not in a tacky way, I promise) and the Sally Hansen Nail Effects are always sold out in the print and I'm not talented enough to draw the design on myself with my Sally Hansen Nail Art Pen (see my review here).
This picture did me in, I had to copy it now. For the gold base color I used my favorite Savina gold shade (see my review here), and topped it off with the OPI Shatter Polish.
Love love love the look! I just know I'm going to go on a shatter polish binge and shatter everything. While at Ulta, I picked up some neon polishes too (you may know from Twitter) and might shatter one or two fingers on my next mani.

Erin over at Everything According to Erin had some problem with the polish "shattering" (see her review here) so I was kind of skeptic at the application, but I found it really easy. I've heard different reviews though, sometimes it worked great and others who also had a hard time with the application. That may be because of the type of nail polish or the brand or maybe mine was thinner or whatever. I was thankful it worked so well for me.

My advice for the process is to make sure your base coat is completely dry, I would think it would work best on top of just one coat. If I had to do two coats for the base color I would probably wait a few hours or until the next day to add the shatter top coat. When applying the shatter, you have to paint fast and you don't really get a chance to go over where you painted because the polish is thick, dries really quickly, and shatters fast.

Pros: shatters quickly, dries really fast, lasts,  is easy to remove (unlike glitter polishes), and your mani- at least for me- lasted about the same time.

Cons: polish is really thick, doesn't coat your nail evenly like reguar polish before shattering.

Have you tried the shatter polish yet? Was it easy for you? Do you love the look?

Wednesday, April 13, 2011

My Sister Tried It: Feather Hair Extensions

**Holy freaking cow. Photobucket has been down for over a day now and I can finally post**


My sister is pretty hip. No, seriously. She's even kind of a hippie and I love it. She recently got spring's new trend of feather hair extensions and I'm totally jealous! (You may remember Pretty Little Liar's feather earring post here) This wedding is putting a damper on some of my beauty ideas, but alas I can live vicariously through my Sister K.

Here's some pics of her awesome feather weave and below a short interview:

This is us at my bachelorette party, you can see the colored feathers just barely on her left side.
They blend in really well.

 
Close- ups via cell phone

Where did you get it done at?
Hair Play in San Diego, CA by Tara Julian


What was the cost?
$25 per bundle (5 feathers)

How long does it last?
Up to 3 months


What colors were available?
At this time, only rooster feathers were available (white, yellow, orange, brown) but typically a variety of colors are available.

What did you get?
One bundle of rooster feathers (white, yellow, orange and brown) towards the top of my head. You can get more done at different places to frame your face and stand out more.

Is it difficult to maintain?
Not at all. You have to be careful brushing your hair. It isn't as high-maintenance as I thought it would be.


Would you do it again?
Yes

What are the pros/cons?
Cons
The colors don't match every outfit

Pros: 
A fun new way to mix up your hair style
You can wash/curl/blowdry/straighten it like regular hair
They're real feathers and not synthetic
The variety of colors to chose from so you can be bolder or have it blend in more
Easy to hide where it's attached


Any advice?
Call the salon in advance about what colors are available, what comes in a bundle or if they're individual, if you can choose what colors come in a bundle, and the cost since it varies.

Thanks sis! What do you ladies think? Is this trending in your area? The sis says it's everywhere in SD. Have you tried this yet?

Tuesday, April 5, 2011

I Tried It!: Hot Pink Lips


If you remember my Spring 2011 Inspiration Board (check out the post here) included a new beauty trend of hot pink lips. I went full force with pink eyes and cheeks as well. It was a bit of an overload and I don't think I'll be rocking it all again as a trifecta, but the pink lips were hot! I know this post is a little late, since I rocked this a while ago, but I had started the post and forgot to publish it so here you go updated and pretty.


I'm wearing MAC lipstick in Bombshell MAC Lipglass in Crystal Rose (no longer available)

I love trying new make-up and have recently been on a lipstick kick, if you can't tell from my previous posts.

Have you rocked out any Spring make-up yet? Summer is almost here, I can taste it!

Tuesday, March 22, 2011

I Tried It/ Product Review: Remington Clipless Curling Iron

Remington CI95AC/2 Tstudio Salon Collection Pearl Digital Ceramic Curling Wand


I've seen reviews on clipless curling irons all over the blog world and in magazines and it's just insane how much everyone loves them. Using a clipless iron helps you to create loose waves like the PYT in Hollywood. I've heard about these irons forever and wanted to try one for the longest time, but I just wasn't willing to spend $$$ on it.

After reading this guest post at Sweet Nothings, I was set. I have straight, fine, flat hair. This was going to be amazing. I was going to buy it and have gorgeous locks come Monday. I went to Target and spotted the Remington T-Studio Ceramic Pearl Professional Curling Wand and promptly dumped it in my cart and raced to the checkout line.

I then practiced all weekend. On myself, on my girlfriends, I watched countless You Tube videos.
This was an EPIC FAIL for me.
There is no luscious loose waves people. I'm getting nothing but corkscrew curls. Like straight out of camp when you would do rag-tie curls (check it out here if you don't know what I mean).

So I tried it again, but with larger section of hair since mine is pretty fine and here's my results:


I feel like Britney Spears circa 2000 when she would have her hair curled, crimped, and wavy all at the same time.

Ok, so I know I'm doing it right. I'm wrapping my hair around the wand using the glove, being sure not to twirl my hair as I wrap, holding it a few second and letting it go. Ok, correction: I talked with my hair stylist and showe her the pics and she thinks that it could be because it's tapered and that I had my hair wrapped around it too long.

I'm wondering if it's because this wand is tapered....I'm pretty bummed. I'm dissappointed in the wand and myself. I had to drown my sorrows in Moscato and chocolate.

What is the problem? Do any of you lovely ladies have any suggestions?

I feel like I can get pretty glam waves with my regular curling iron by starting 2 inches from the root and leaving the last 1-2 inches out. I really want PYT Hollywood waves though. Waaaaaaaaaaaaaaaaaaaaah.

OH, btw the wand has several temperatures, going up to 410 degrees, has automatic shut-off, and comes with a MJ glove to wear while using. Plus it's a pretty pearly pink color. I think this would be good for people who have a hard time curling their hair, it's pretty easy wrapping your hair around the wand or for people whose hair doesn't hold a curl well. I'm not knocking the product, I just don't get the results I want. Boo hoo hoo.

Tuesday, December 14, 2010

I Tried It/ Product Review: Sally Hansen Nail Art Pen


So this post is BOTH a I Tried It and a Product Review, which I think will sometimes happen depending on what look I'm trying to do and what not. Glamour had a post about Black-andWhite Striped nails and I loved the look! The ones from the post are Minx Nails, but I thought I could copy the effect with a nail art pen. It was a fun and bold look, and garnered plenty of compliments and questions. Definitely a fun look to copy! I submitted the picture above to Glamour and was featured on their The Girls of the Beauty Dept section here. So exciting, I love their magazine and their website! Thanks Glamour for featuring me!


Sally Hansen Color Quick Nail Pen Black


I bought the Sally Hansen Nail Art Pen in Black and thought it would be great to do stripes, polka-dots and hearts on my nails. It comes in 8 colors and is SO easy to use. You pump the pen a few times on a surface you don't care about getting the paint on and then the color flows just like a pen. It's really easy to handle and the color comes out great! The first time I used it (above picture) I did stripes, but they came out a bit runny when you look up close. I think it was just because it was my first time using the product and not a reflection of the pen itself. You need to top it off with a clear coat over your design and ta-da! Artsy fartsy nails.

I snagged this pen from a great sale at Rite Aid for buy one Sally Hansen product, get one free. I've been wanting this pen forever, but couldn't bring myself to pay $7 for it. I'm a cheapie when it comes to nail stuff sometimes, so sue me. However, seeing how easy it is to use, the great quality of the Sally Hansen brand I think it's a great price and worth the purchase.

What do you think of the striped nails? Would you be interested in seeing more of my nail art using this pen? Have you used art pens before? What brand did you use, did you like it?

Wednesday, December 1, 2010

Quick Review of LLP

Hello lovely readers! I'm looking to make some possible changes to Love Lipstick and Pearls (LLP) and would love some feedback from you!! I'd love to see LLP grow in terms of content, but want to see what type of posts you like best.


Please vote on your favorite posts below and let me know anything extra in a comment. Also, I'm thinking of mixing up some of the posts and I've tested some of these out already, check out Beauty Inspiration, I Tried It and Recent Purchases and would like to see what my lovely readers think of them and my usual posts. Based on what this polls shows, I'll know where to focus my posts and how to give what you guys enjoy back to you.

As always, any suggestions are always welcome!! Please feel free to vote as many times as you like since you can only vote for one item at a time.

Tuesday, November 30, 2010

I Tried It: Red Lipstick

I've had this picture hung up on my inspiration board for a while and the Fiance has been digging how I look with lipstick on so I was on the hunt for a nice red one. So I used Maybelline's website tool Color Sensational Shade Finder to help find a good shade for myself. Have you ever used their tool before? It's so fun!

You put in your skin tone and if there's a specific shade of lipstick you're looking for; pinks, naturals, plums, reds or pearls and it automatically uploads lipsticks colors for you on the right. You don't have to pick just one shade either but look for all the shades or just a few. Then you choose items that characterize you like a strand of pearls, heels, a flower, glass of wine etc. to further narrow down your colors. I changed my items a few times and then went with the color that came up most often.

 Maybelline Color Sensational Lipstick - Red Revival
Dun, dun, dun. The winner is Maybelline Color Sensational in Red Revival.


It's a matte color and I topped it with Victoria Secret Beauty Rush clear lipgloss. Wearing red lipstick is so bold. I literally expected every person I saw comment about it, but naturally only my closest friends had anything to say. It made me feel like a bombshell or at minimum a MAC beauty artist since I wore an all black outfit with it.

The only downside to the red shade is that you have to be so careful applying the color to get it just right because you don't want it to smear and since it's so bold it really shows off the shape of your lips. You also have to reapply it a few times since it does wear off from talking and drinking. I expected it to be a bigger pain in my rear than it was, but I don't know if I could go everyday rocking it since I was so conscious of my lips and whether or not I need to reapply or if it had smeared across my face.

Overall it was such a fun experience. I know that may sound lame because all I did was wear bright lipstick, but it's true! I've only worn bright pinks or nudes before so this was a whole new ball game. It was fun to change up my make-up and not just my eye make-up, which is what I primarily focus on.


For my make-up, I took a few hints from Olivia Wilde's beauty look above and wore a simple shimmery nude color on my lids, black liner all around my eye, a gold highlighter in a C shape on the top of my cheeks and outer eye area and two coats mascara. For my lips I put foundation as a primer for the color, then carefully applied the lipstick straight from the tube. I've read before that a lipbrush is easier to apply color and I tried it that way, but it was more of a pain than just being careful. After it was applied, I blotted a few times and topped it with gloss.

How do you like it? Have you worn red lips before? Have you tried any bright colors?

Tuesday, November 16, 2010

Mascara & Liner: The Battle Between Brown vs Black

This week I've had a little showdown using black mascara and eye liner and then switching to brown mascara and eye liner. I've never tried brown mascara before, or even the black-brown color. I've had some friends who used it and I could never understand why you would unless you had fair skin, light eyes and light hair. However, even though I love dramatic make-up, I also love the natural look of make-up and thought I should give it a whirl with the brown.


Here I am with the brown:


Here I am with the black:

I think the brown is much more natural looking, is very soft and flirty and the perfect look for day time or when I'm wearing just mascara and no liner. As for the black, I felt that it gives my eyes more of a "pop" and helped them to stand out. Now, I do see that I am definitely more "awake" in the second photo and can't tell if it's really the black mascara/liner combo or the fact that I indeed was more awake for the picture. The world will never know....

Overall, I really like both looks and plan on investing in some good brown mascara and liner instead of the $1 ones I used for this experiment (I just didn't want to spend the dinero if I wasn't going to like the product). I've seen been switching back and forth between the two colors depending on my make-up look I'm going for since starting the experiment and would definitely suggest to everyone out there to try brown mascara/liner if you have not already!

It's such an easy change, one that few would probably notice other than yourself. The brown is perfect on days when you're not doing a full face of make-up (like eye shadow) or when you're looking for a more natural look. If you're going out for a hot date or wearing darker eye shadow, I would definitely suggest that black mascara/liner is the better choice because the brown doesn't stand out as much against the shadow as black.

Which color do you like best on me? What color mascara and liner do you use? Have you always used one shade and not another?